Tue, 8 Dec 2015 #
Swift Package Manager: Create and Use a X11 package on Linux
This post is also available in 🇨🇳Chinese Thanks to SwiftGG
Now that Swift is open source, many interested users might be installing and testing it on their Linux systems. However, currently the Foundation framework is still very much a work-in-progress so if you're interested in developing more than a simple shell app, you'll need to link against existing Linux libraries like GTK, Cairo, or libpng in order to gain access to useful functionality.
I just finished implementing a simple Swift app which links against X11, the most basic Unix UI library 1. In this short tutorial, I'll show how to write a simple X11 app, and how you can utilize this to link against other libraries.
In the process, we'll also use the new Swift package manager to create a simple re-usable package for the X11 library.
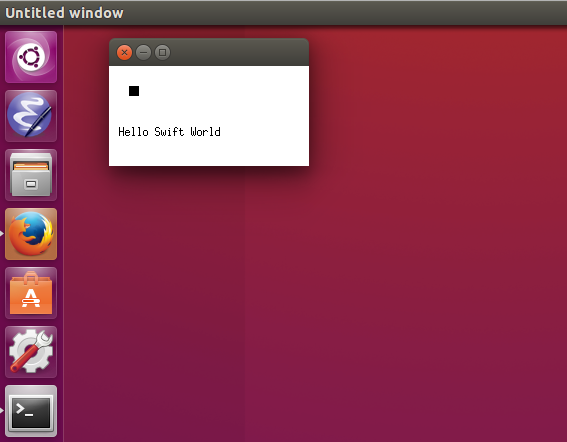
Here's a screenshot of the finished app in action2:
1 Swift Packages
Before we write our actual X11 app, we need to define a Swift package which defines the links against the X11 library. Once this is done, we can easily share this package with other users, or re-use it in other projects. We have to differentiate between defining a package and using a package. Let's start with the first and then see how we can use that package.
1.1 Defining a package
Create a new folder which will host our package. Since we're linking against a C library, we follow the guidance of the Swift Package Manager documentation and prefix our library with the letter C3. We'll name our library CX11.swift
mkdir CX11.swift
In our case, we want to link against an existing C API and we do not intend to write any Swift wrapper code. Linking against C libraries and headers is achieved via the module.modulemap file which contains the necessary directives for the Swift compiler to perform the correct linking. The documentation for the modulemap syntax can be found here. We create the module map file, and edit the contents (via an editor of your choice, in this case we're using nano):
touch CX11.swift/module.modulemap
nano CX11.swift/module.modulemap
X11 is a huge library with a lot of functionality. You can see the contents if you head over to /usr/include/X11. For our example, we don't need to include all the header files in there, instead we really only need two of them: Xlib.h and X.h. For different other libraries, you may need to include more headers. There is a convenient way to include all the headers in a directory which I'll point out below. Apart from including the headers, we also need to tell Swift which library to link against. We're using the link keyword for that. Our modulemap looks like this:
module CX11 [system] {
  module Xlib {
	  header "/usr/include/X11/Xlib.h"
  }
  module X {
	  header "/usr/include/X11/X.h"
  }
  link "X11"
}
We're naming our module CX11 and we're creating two submodules. One for the Xlib and one for X. Each submodule defines the header it needs to import. Finally, we're linking against libx11 via the link statement.
But what if we have not just one header file, but many of them. Module maps allow you to define an umbrella header or an umbrella directory.
Umbrella Header
This is a header that contains just references to other headers (via #include) commands. A good example is <Cocoa/Cocoa.h> or <Foundation/Foundation.h> or <gtk/gtk.h>.
Umbrella headers are defined via the umbrella keyword:
umbrella header "/usr/include/gtk/gtk.h"
Umbrella Directory Sometimes you have a directory of headers but no umbrella header. In this case you just point Swift to the directory of headers:
umbrella "/usr/include/X11/"
In addition to the modulemap, we'll also need a Package.swift file, otherwise building will fail. This file can be empty though:
touch CX11.swift/Package.swift
The Swift package manager uses Git and Git Tags in order to manage packages. So before we're done, we need to create a Git repository for our Package, add all the files, and create a version tag. This is fairly easy though:
cd CX11.swift
git init
git add .
git commit -m "Initial Import"
git tag 1.0.0
cd ..
The commands above go into the folder, create a new Git repository, add all the files to it, create a first commit, and finally add a version tag (1.0.0) for this commit.
That's it, our package is defined, but how do we use it?
1.2 Using Packages
In order to use a package, we need to define a Package.swift file which will tell Swift which packages we intend to import for our project. But first, we need to create a directory for our project.
mkdir swift-x11
touch swift-x11/Package.swift
touch swift-x11/main.swift
Keep in mind that (for this example to work) the swift-x11 folder has to be next to the CX11.swift folder. I.e.:
ls -l
CX11.swift
swift-x11
Before we start writing the actual Swift code to interact with X11, we need to tell our swift-x11 project how to import the CX11 package. This is done, as explained below, via the swift-x11/Package.swift:
import PackageDescription

let package = Package(
  dependencies: [
    .Package(url: "../CX11.swift", majorVersion: 1)
  ]
)
This tells Swift that the package we intend to use is located in the ../CX11.swift folder.
The url (as the name suggests) does not need to be a local one. I've uploaded my own CX11.swift to GitHub, and you could alternatively link directly to the GitHub version as follows:
import PackageDescription

let package = Package(
  dependencies: [
    .Package(url: "https://github.com/terhechte/CX11.swift.git", majorVersion: 1)
  ]
)
2 Using X11
Now that we defined an X11 package, and set up the package manager definitions, we want to write our first X11 application.
One issue which I could not solve is that macro definitions in the X11 header file are not imported into Swift. The Xlib.h defines many shortcut macros like:
#define RootWindow(dpy, src) (ScreenOfDisplay(dpy, src)->root)
#define ScreenOfDisplay(dpy, scr)(&((_XPrivDisplay)dpy)->screens[scr])
As these were not imported, I decided instead to always write out the contents of the macro. All the code below has to be put into the main.swift file. You can also see the finished version here on GitHub. Please note that this is a simple and non-memory-safe example. This mostly serves to explain how to use C libraries under Linux. Also, my X11 knowledge is rather limited. I did Linux X11 programming more than 10 years ago and forgot most of it, so there may be factual errors in the explanation below. If you find them, feel free to open a PR on this repo :)
We begin by importing the CX11 library which we defined above:
import CX11.Xlib
import CX11.X
2.1 Setting up state
After this, we have to define a couple of variables.
- We need the X11 display (i.e. roughly speaking the X11 server connection). This will be the
dvariable - We need a placeholder for the X11 window which we create. This will be the
wvariable. - We also need to set aside a bit of memory for the X11 Server to store X11 input events. This is the
evariable. - We should also already store the text which we want to display in our window. This is the
msgvariable - We need a place to store the current X11 screen (a X11 Display can have multiple screens). This will be the
svariable. - Finally, we need a pointer to the X11 root window, which houses the other windows. This is the
rootWindowvariable.
// The X11 Display
var d: _XPrivDisplay

// The window which we will create
var w: Window

// The events which X11 generates for us will be stored here
var e = UnsafeMutablePointer<_XEvent>.alloc(1)

// The text to display
var msg = "Hello Swift World"

// A pointer to the current X11 Screen
var s: UnsafeMutablePointer<Screen>
Now that we defined our variables, we need to open our connection to the X11 Server. However, as users can also run this app when no X server is running (i.e. in console mode) we need to make sure that the connection succeeded:
d = XOpenDisplay(nil)
if d == nil {
	fatalError("cannot open display")
}
After we opened the display, we'd like to get the current default screen as well as the current root window. The RootWindow macro is not available4, so we will access the memory section of the C struct directly. However, as the current screen s is a UnsafeMutablePointer, we need to add the memory property in order to access the root instance.
// Get the default screen
s = XDefaultScreenOfDisplay(d)

// And the current root window on that screen
let rootWindow = s.memory.root
2.2 Creating a Window
Finally we have everything in place to create our own window and place it on the screen. We're using the XCreateSimpleWindow function for that. The function has the following parameters:
XCreateSimpleWindow(Display *display, Window parent, int x, int y,
  unsigned int width, unsigned int height, unsigned int border_width,
  unsigned long border, unsigned long background);
border and background are color values. In order to not think about color creation, we will simply pass in a reference to the default black and white colors which are defined on the current screen. We have to use the .memory property again.
// Create our window
w = XCreateSimpleWindow(d, rootWindow, 10, 10, 200, 100, 1,
  s.memory.black_pixel, s.memory.white_pixel)
This will create a new window on the rootWindow position 10/10 of width 200 and height 100. The borders will be black, the background will be white.
2.3 Input Events
Of course, we also want to receive input events from the Xserver. In our case we'd like to know when the window is being displayed so that we can draw it, and we'd like to know when the user pressed a key so that we can quit the app. The first event is the Expose event, the second one is the KeyPress event. Receiving events works by registering event masks via the XSelectInput function:
XSelectInput(d, w, ExposureMask | KeyPressMask)
Now that we created our window, we want to display it. This is done via the XMapWindow function:
XMapWindow(d, w)
2.4 Event Loop
Finally we do have everything in place to run our event loop while the window is being displayed. For this, we're using a while loop which continously pulls the XNextEvent function to get new X11 events. Then, we'll test the event to see whether it is a Expose or a KeyPress event5. We're testing the events using the swift switch statement:
loop: while true {

  // Wait for the next event
  XNextEvent(d, e)

  switch e.memory.type {
    // The window has to be drawn
    case Expose:
    // draw a small black rectangle
    XFillRectangle(d, w, s.memory.default_gc, 20, 20, 10, 10)
    // draw the text
    XDrawString(d, w, s.memory.default_gc, 10, 70, msg, Int32(msg.characters.count))

    // The user did press a key
    case KeyPress:
    break loop

    // We never signed up for this event
    default: fatalError("Unknown Event")

  }
}
Our e event structure is - again - a UnsafeMutablePointer, so we have to access the actual structure via the memory property. The Expose event means that the window is visible, so we have to re-draw it. Our drawing is very simple: We're using the XFillRectangle call to draw a small black box, and the XDrawString call to draw our initial msg text in the window at position 10, 70. Please note that I don't know whether X11 expects unicode or ascii, so the Int32(msg.characters.count) is probably wrong, but it works in this example.
The other event, KeyPress allows us to break the outer while loop and quit the app once the user enters a key.
3 Running It
To use this, simply check out the repo (preferrably on Linux) and do the following in the folder:
swift build
This will clone the CX11.swift package and build the binary in the .build/debug folder.
Run it via:
.build/debug/swift-x11-example
This will execute the binary, and a small X11 Window should appear on your desktop:
4 Conclusion
This was a very simple example of how to use Swift under Linux to write an X11 app. This will also work for all kind of other apps using other libraries, of course. This tutorial also explained how the new Swift Package manager works by creating and using a simple X11 package.
Footnotes:
If you read this far, you should follow me (@terhechte)
on Twitter